How to set up raspberry pi headless with ssh and wifi
Setting up raspberry pi is a bit tedious when doing it over attached monitor, keyboard and mouse (I usually don’t have those around anyway, being laptop only at the moment), so here’s a good and easy way to get an installation directly from your laptop, making the pi automatically join your wifi and enable ssh:
Flash
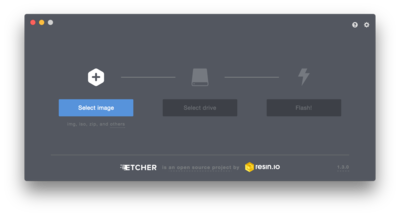
I found that etcher.io is a very easy way to flash, in order to do so:
- Install etcher (available for linux/osx/windows)
- Download image: I chose the raspbian lite version from official
- Open etcher etcher (on linux just unzip the etcher.zip and open the executable therein)
- Insert sd card (don’t mount it yet!), watch that etcher now detects that new card in the middle
- Select image e.g.
~/Downloads/2017-11-29-raspbian-stretch-lite.zipand flash (for linux i3 users: you’ll get a polkit error. You’ll need to start a polkit agent, e.g./usr/lib/policykit-1-gnome/polkit-gnome-authentication-agent-1before flashing)
Enable ssh and wlan on the image
Etcher just created two partitions: a boot partition and a data partition. First, find out the device files of the two partitions using sudo fdisk -l. In my case I found:
Disk /dev/mmcblk0: 14.9 GiB, 15931539456 bytes, 31116288 sectors
Units: sectors of 1 * 512 = 512 bytes
Sector size (logical/physical): 512 bytes / 512 bytes
I/O size (minimum/optimal): 512 bytes / 512 bytes
Disklabel type: dos
Disk identifier: 0x37665771
Device               Boot   Start     End Sectors Size Id Type
/dev/mmcblk0p1       8192   93236   85045 41.5M         c W95 FAT32 (LBA)
/dev/mmcblk0p2      94208 3629055 3534848  1.7G        83 Linux
The relevant lines are the last two lines whereas mmcblk0p1 is the boot partition and mmcblk0p2 the data partition
Enable ssh
Create the mount point and mount it i.e. in my case this was
mkdir /var/tmp/sdcard
sudo mount -t vfat /dev/mmcblk0p1 /var/tmp/sdcard
whereas -t vfar is the file system (corresponds to W95 FAT32) and /dev/mmcblk0p1 is the device from above (be sure to take the first one, that with the lower start number). Now enable ssh and unmount again:
sudo touch /var/tmp/sdcard/ssh
sudo umount /var/tmp/sdcard
Enable wireless
Mount the data partition (take the second /dev/... from the fdisk call)
sudo mount -t ext4 /dev/mmcblk0p2 /var/tmp/sdcard
Then run
wpa_passphrase <ssid> <password>
to create the wireless config which you need to put into /var/tmp/sdcard/etc/wpa_supplicant/wpa_supplicant.conf. Be sure to delete the plain text psk line. Finally, unmount with:
sudo umount /var/tmp/sdcard
Profit!
Boot your pi, check your router for the ip address and ssh in with ssh pi@192.168.x.x using raspberry as password.
A good first step is to sudo raspi-config and use it to:
- change password
- generate the locale (get rid of the
warning: setlocale: LC_ALL: cannot change locale (en_US.UTF-8)) - set the correct timezone
And, of course add your public key to authorized_keys:
cat ~/.ssh/id_rsa.pub | ssh pi@192.168.x.x "mkdir -p ~/.ssh && chmod 700 ~/.ssh && cat >> ~/.ssh/authorized_keys"
Comments